100 Miles, No Support, and Questionable Snacks
Bikepacking Lessons From the White Rim
Photos & Words by Katie Lasak
So you want to take a bikepacking trip? Let’s do it!
The growth we’ve seen in the world of bikepacking has been undeniable over the past few years. You know…that thing where you load all of your gear onto your bike and pedal off into the sunset? I’d only heard stories of friends going on multi-day bikepacking trips and how unforgettable each adventure was. It’s why, when a few friends asked if I’d like to bikepack the White Rim Trail in Canyonlands with them this spring, I couldn’t pass up the opportunity.
As a backpacker for the past decade, going off-grid, carrying everything needed with me was not a new concept. I figured I could do it on a bike. How hard could it be? Then I thought about thrusting myself into triple the daily mileage, the looming threat of a mechanical issue happening to my only mode of transportation, 60 miles into the exposed desert. I can admit it…it all felt intimidating.
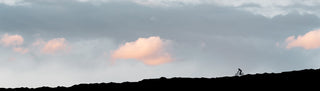
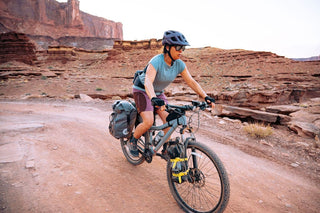
The White Rim is a bucket-list bikepacking trip. However, most don’t usually tackle it fully self-supported over 3-days. It’s common to see people take support vehicles along for the ride, or cheer on the overachievers as they knock out the 100 miles in a day. We weren’t going to have a support vehicle carrying our water, giving us a reprieve from the heat, or even carting around ingredients for delicious meals each night. It was just going to be us and the desert.
The exposure and the heat make it difficult to take everything you need for 3 days, but we were excited for the challenge, and confident in our abilities to at least try. Coming out the other side, we learned a lot about ourselves and bikepacking…and a cold drink never tasted better.
The process of prepping for a first bike packing trip (and actually executing it successfully) will teach you a lot. I’m here to share everything I learned with you in this comprehensive guide so you can go into your first bikepacking adventure prepared, proactive, and pretty stoked. In this guide you’ll find information on:
- Choosing the Right Bike
- Bikepacking Equipment
- Trip Planning Considerations
- Packing Your Bike
- Important Learnings
- Bikepacking Packing List
“That bike isn’t going to work.” -Paul
Going into this trip, I had a vision in my mind that my rig of choice would be my mountain bike, a brand-new Juliana that I’d gotten at the end of last season. I was super comfortable riding it, it was light, yet it felt burley enough to tackle anything that the trail would throw at us. Sadly, as I came to learn, carbon frame is not the most ideal for a bikepacking trip.
With temps looking to push 100° each day, we knew we would need to bring a lot (A LOT) of water, so a carbon frame was not going to cut it. The amount of weight we were looking to pack on our bikes for 3 days and 100 miles in the desert was not going to play nice with a carbon frame. Plus, it had the potential to mess up my suspension if not adjusted correctly. It was a mess of problems I simply was not prepared to tackle, so I excitedly set my sights on a new bike instead.
Thus began the hunt for the perfect bikepacking bike. The ideal bike had to be burley enough to tackle desert sand traps and some techy terrain, while still being fun and sturdy on a downhill jaunt, and one that could ensure all of the gear would be attached. Oh…and it couldn’t break the bank. I hadn’t planned for a new bike this season, but came to accept it was necessary for this trip.
Some considerations that were kept front of mind when looking for the perfect bike were the frame material, frame mounts, a dropout eyelet, and reliable (but affordable) components.
- Frame Material- When looking for a bikepacking bike, I set my sights on a steel frame, which would allow the bike to be durable enough to confidently strap weight to it without worrying about bending from the weight being strapped to it. Steel is a great choice for a first bikepacking bike particularly because of its durability, as well as its ability to be easily repaired. Plus, it’s generally a more affordable option when it comes to bike frames.
- Frame Mounts- An important factor for this bike were the inclusion of frame mounts. These are something you might have never noticed on a bike until you actually look for them. These mounts are small screws and washers on the frame that allow you to attach things like extra water bottle holders and frame bags to your bike, ultimately allowing you to customize your gear setup and carry what you need. The bike I chose had frame mounts across the frame, on the front fork, and the back, allowing me to attach extra equipment and carry the right amount of gear for 3 days.
- Dropout Eyelet- Another key feature needed on this bike was a separate dropout eyelet by where the bike’s rear thru axel sits. This extra eyelet that is typically not found on traditional mountain bikes and many road bikes allows you to easily attach a rear rack, which acts as an additional attachment for saddle bags and other gear you’re looking to carry.
- Components- Components can be tricky, because they can drive the price of a bike up exponentially, but they also make a huge difference in riding and reliability. It really comes down to what’s important to you on your trip and in your bike. Smoothness and reliability were important factors for me, but I also didn’t want to break the bank. I was willing to pay a little bit more for slightly better performance, and to make sure my derailleur didn’t fail on me 50 miles into the desert, but was willing to sacrifice the best of the best to stay within budget.
Ultimately, after scouring Marketplace and numerous gear shops around the Salt Lake Valley, I ended up getting a Kona Dr. Dew. This steel bike had all of the requirements I was looking for while landing in my ideal price range of around $1k. Additionally, I felt comfortable with this bike as an around-the-town cruiser once the trip was done just in case I didn’t end up liking bike packing (which, spoiler alert, I now love).
Like any bike, what you choose should fit your riding style comfortably. Everyone’s needs are different and it’s up to you to decide what factors will be most important to you on your trip.
“Is this too much?” -Katie
If you’re a clinical overpacker like myself, you might want to think again when you start planning out how and what you’ll be packing on your trip. The more you pack, the harder it will be to pedal, especially on the uphills. So planning your equipment setup is essential in knowing how much you can and will be able to pack.
The first step is figuring out the equipment you’ll need in order to bring along the necessary gear. This equipment will consist of items such as:
The first step is figuring out the equipment you’ll need in order to bring along the necessary gear. This equipment will consist of items such as:
- Saddle bags
- Frame bags
- Fork bags
- Handlebar bags
- Tube packs
- Seat packs
- Fork water bottle holders
- Water bladders
- Stuff sacks
- Plus many other neat attachments.
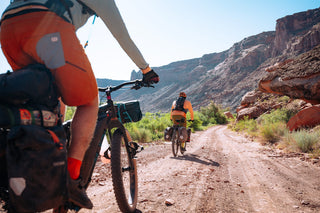
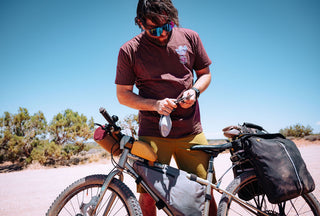
For my setup, I planned to have saddle bags to carry my food, water, and camping supplies, and a frame bag to carry my clothing. We knew we would need to bring more water than is likely typical due to the projected heat and exposure, so we planned to each have a 10L bladder and extra water bottle holders. In typical fashion, I managed to throw a wrench into things by bringing along my camera. It was a non-negotiable, and I knew it would be a challange to find something that I felt confident storing my camera in, but could carry the gear I needed.
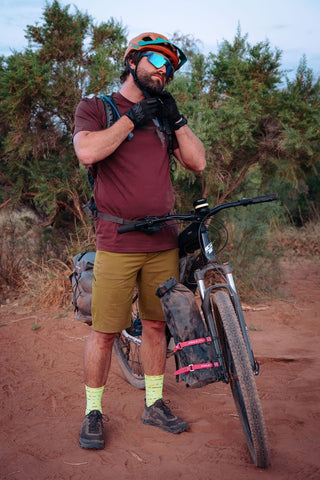
The perfect equipment mix was found in a frame bag that would sit in the frame between my legs, a front bar pack for commonly needed items, and a Top Peak Trunkbag. While I would recommend traditional saddle bags over this trunk bag simply because traditional saddle bags have increased space and durability, this worked well as it provided a safe space for my camera to live on top, while leaving room to pack a water bladder and food sack in the saddle bags. A back-loader pack is also a nice addition to round out your rear carrying capacity if needed.
For extra carrying capacity, there are bags and holders that can be added directly onto your fork. We chose to use this space to carry extra water bottles, but you can choose to carry extra clothing or gear here, or any extra equipment you may need.
An additional piece of equipment to consider is a hip pack with integrated hydration. I often forget to drink, so I found this piece of gear very valuable. The integrated hydration straw kept water easily accessible, along with any items I might need to grab quickly, such as very important snacks.
Ultimately, the bags and carrying equipment you choose can be hyper-personalized to your travel style and what you’ll need to pack for each individual trip.
“You and your stupid computer.”- Jackie
Our motto going into this trip was “You don’t have a choice.” When we were 50 miles into the middle of the White Rim, we knew we wouldn’t have a choice but to get through it. When our bodies would feel tired, we didn’t have a choice but to get through the daily miles. When we felt mentally drained, we just kept saying that we didn’t have a choice but to push the doubt aside and keep going. Once we started, there was no other choice than to finish this trip.What we did have a choice over were the things we could plan for. How many miles were we going to bike each day? Where would we stay? What time were we heading out each day? Were we bringing freeze dried meals or lugging in ingredients for PB&J’s? Being able to plan these parts of the trip before made it so we could put more focus on the journey that was in front of us as we were in it, especially when the unexpected happened.
Route planning: Set aside a good chunk of time to plan out your routes, mileage, campsites, permitting, and start/finish lines. Each piece is going to be essential in making sure you trip goes smoothly. For our trip, planning out our campsites and applying for permits as soon as they opened was a necessity as campsites were few and permits went quickly once they opened.
Once you know where you’re looking to get on each day, you can go about planning out your mileage and elevation. This doesn’t matter to some people, but we really liked knowing what was ahead of us each day.
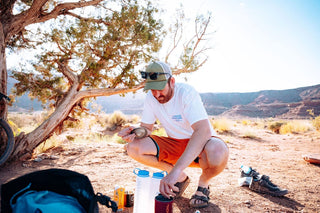
Meal Planning: Knowing this information can also help you plan out your meals for each day. If your daily mileage is more than you’re used to riding, maybe bring some extra food to stay fueled. If there’s a pretty flat day, maybe you might eat less. But staying fueled is key! We decided on freeze-dried meals with high calories as they were lighter and more compact.
Prepare for the Unexpected: All of this said, be prepared that not everything is going to go smoothly, even with the most precise planning. One of our least favorite but most memorable moments from our trip came as we were rounding out Day 1. Two in our group were tracking mileage, one with a bike computer, and after 25 miles were coming up on our final 5 miles of the day (allegidly). It was a steamy trudge, stopping every so often for shade and reprieve from the sun, and when we hit the end of those 5 miles where our campsite should have been…there was no campsite. We had misread the GPS and still had another 7 miles to go.
In the spirit of You Don’t Have a Choice, we continued on, with our friend mumbling under her breath “you and your stupid computer”.
Some helpful tips:
- Plan out Strava segments to view mileage and follow your trip
- Buy a physical map (just in case!)
- Plan out the types of meals you’re bringing plus their weight implications
- Be prepared for any hiccups
- Lay out a training plan a head of time
- Know it’s going to be hot? Plan to start your days early.
Ensure that you explore all necessary permits and processes before you set out on your own trip!
“Streamlined is dream-lined”-Paul
Another fun, custom element of bike packing is getting to pack your bike. While much of this is based on personal preference, there are some similar philosophies to bike packing and backpacking.
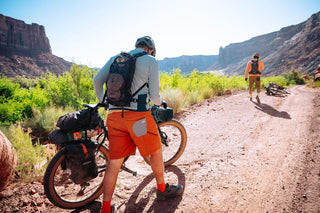
Weight: Weight will be one of the main considerations when you’re deciding which gear to take. Because everything will be attached to your bike, it will affect your efficiency depending on your fitness level, how long you’ll be pedaling for, and the elevation gains on your ride. If you pack too much, the riding will be tougher. However, as you run through things such as water and food, the load will become lighter.
Gear Placement: In terms of where your gear will go, make sure the items you’ll need while you’re riding accessible, and keep heavier items and the things you won’t need until camp within the frame and saddle bags. Housing items such things as a map, your phone, and extra snacks in a handlebar bag keeps these items right at your fingertips if you need them.
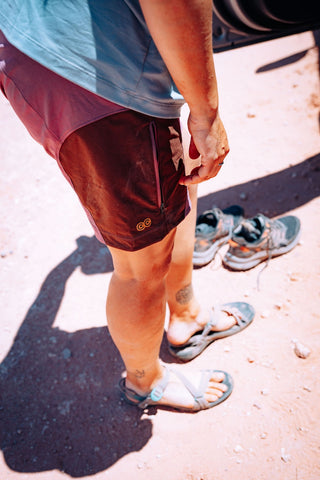
Take time about a week or two before to practice pack! A practice pack is valuable to make sure everything attaches properly, and to test if all of your water, food, clothes, and camping supplies will fit. Taking time in your driveway or garage figuring out where items fit best and in what pack will help eliminate any chances of you figuring out that everything won’t fit right while you’re at the trailhead. For instance, I discovered that my waterproof saddle bags wouldn’t fit on my rear frame with Trunkbag on top, so I knew I’d have to fit everything within the slightly smaller saddle bags that were integrated into the Trunkbag. It wasn’t ideal, but it was better than getting to the trailhead to find out what I had originally planned actually wouldn’t work…like at all.
“Enjoy the Ride” - All of us (now)
There were many opportunities for growth that came out of this trip, from route planning to discovering where we could’ve cut weight. It’s hard to understand some nuances until you do it yourself, and there are always learning opportunities on any trip.
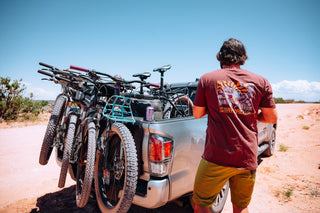
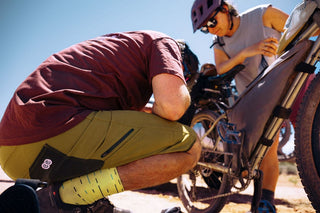
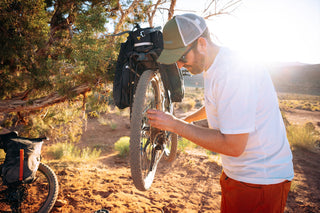
Check equipment at the start of each day: Before you head out or go to bed the night before, make sure everything is tight and working properly. Clean chains and check that gear shifters are working properly. Check that screws and bolts attaching anything important are tight. With the extra weight and sometimes chattering motion the trail can produce, things will inevitably shift and loosen. Almost every morning we noticed screws that were loose on our bikes, or something that needed to be tightened or adjusted, and if we didn’t address it, it became an issue on the trail.
Extra tools + gear: Always bring the extra tools needed and be prepared for anything to break. This means ensuring you have things like multi-tools, a few extra screws, extra tubes, and a portable pump with you. Around mile 50, the screws securing my rear frame completely snapped due to the weight in my bag and a bumpy morning. Because we had the proper extra tools and equipment, we were able to remove the broken screw ends and replace them with the extras we had on hand.
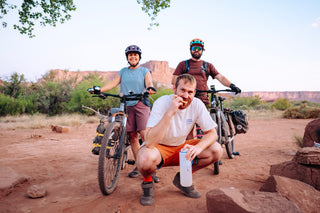
Ask for what you need: If you need something don’t be afraid to ask others on the route if they can help. The worst they can say is no. Because it was so hot on our trip with many miles of exposure and sun, we went through more water than we were able to carry. Thanks to a slew of trail angels, we were able to refill each day, and people who passed us in cars always asked if we needed anything. We even had a group of overlanders leave us their chairs and cot for the evening to rest. Don’t be afraid to ask for what you may need, because many people would love to help!
Overall, bikepacking takes a lot of prep, planning, determination, and equipment to be successful. But as much as you plan, there will always be those moments that you never saw coming, and those will be the most memorable. Like when the screws on my back frame snapped at mile 50 and we had to find replacements. Or when we got to camp at the end of day 2 and 36 miles of riding in the heat and plunged into the cold Green River. Or the never-ending hills on our final 10 miles that made us question our will to live. Or the numerous trail angels we came across who refilled our waters, offered us snacks, and left us chair and cots to rest in (shout out to Brody, Jim from Oregon, and the NPS rangers) because they restored every piece of us mentally and physically without even realizing it. Pretending the boiling hot water in my reservoir was a cold Sprite and the far too many times we had to push our heavy bikes up inclines will stay with me forever.
The best advice I can give you when starting this journey into bikepacking? Enjoy the ride. Enjoy each step of planning, getting your new gear (maybe even a new bike?), seeing a new place from a perspective most never will. Enjoy that first moment of hopping on your bike and that alien feeling of not yet being used to the extra weight pushing you forward. Enjoy being with your friends far from civilization, the conversations you’ll have at each stage of the journey, and feeling so unbelievably, wonderfully exhausted at the end of each day. It is such a magically unique sport that lets you have magically unique adventures, and I fully believe everyone should experience it.
Bikepacking Must-Haves
How to stay cool like Katie, Paul, Jackie, & Mike